Welcome to the thrilling world of motorcycling! As a beginner how to ride a motorcycle? It’s essential to familiarize yourself with the fundamental controls of your motorcycle. This guide will walk you through the primary components and how they operate, setting you up for a safe and enjoyable riding experience.
Overview
Before You Get Started
Keep in mind that riding is a very dangerous activity.
You need:
- To get your balance first. The best way to achieve this is by riding a bicycle.
- To take a motorcycle safety course if possible. As it gives you the best instruction to learn proper riding techniques and safety. A basic rider course is good enough for you and they may provide you with a motorcycle to use if you don’t have one.
- To go over some mind-training (basics of motorcycle operation and safety) in your head first, like you’re reading in this post.
If you don’t want to pay for those training courses yet or no course available in your area.
- Just get some help from a motorcyclist friend or a coach, and ask them a favor as a supervisor during your practice.
- And you have to borrow a motorcycle (rent one or buy one)
You should:
- Do not underestimate the risks of riding.
- Locate an empty parking lot before getting started to practice on a motorcycle.
- Never get on public roads unless you have taken care of any licensing and insurance.
Step 1 – Prepare Your Safety Gear
To avoid any motorcycle accident (even if you’re practicing at an empty place), make sure you’re protected by wearing as much safety gear as possible.
Meanwhile, you should pay attention to shopping for the right gear that fits you well, below are 5 essential gears before you get on a motorcycle:
Step 2 – Inspect Your Motorcycle
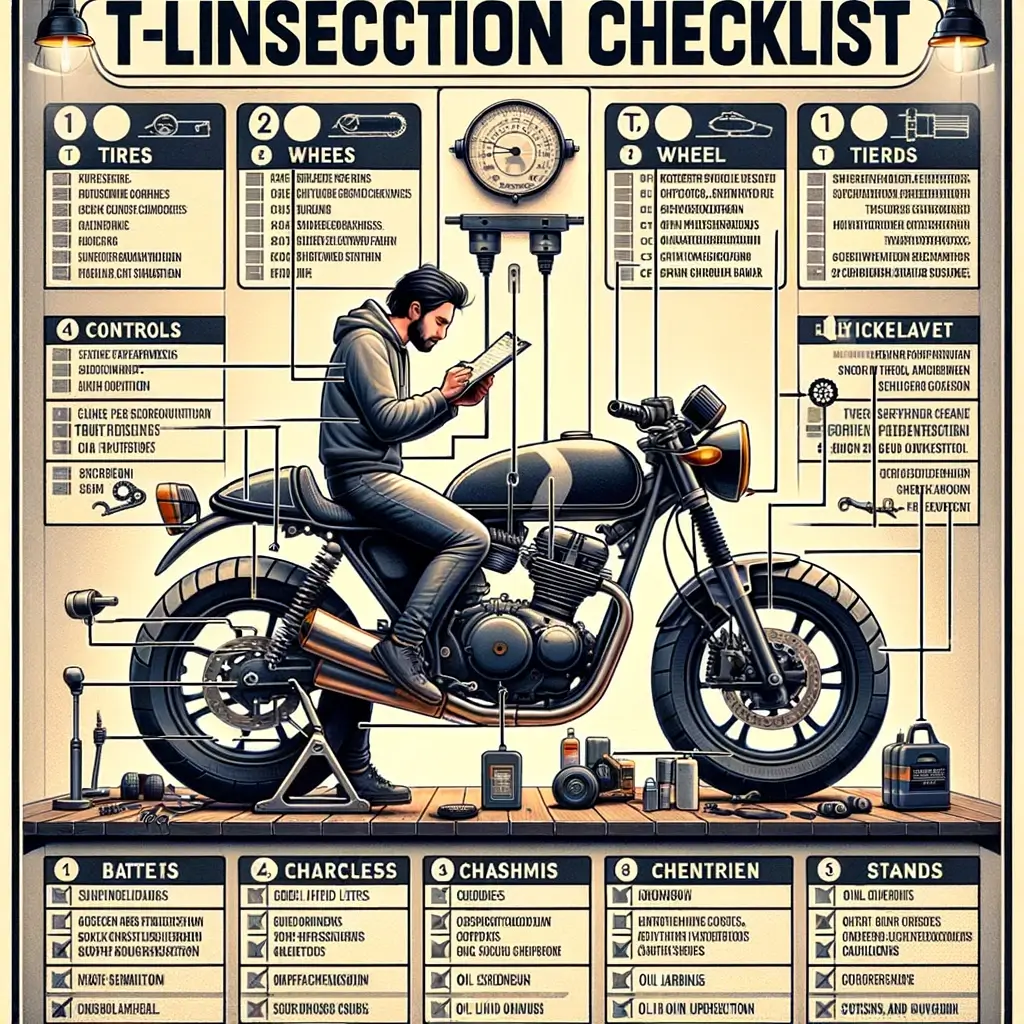
Make sure to give your motorcycle a thorough inspection before practice hitting the road. Such as the T-CLOCS Inspection Checklist by the Motorcycle Safety Foundation.
- T: Tires and wheels
- C: Controls, including levers, pedal, cables, hoses, and throttle
- L: Lights, including batteries, headlights, turn signals, mirrors, etc.
- O: Oil fluid levels
- C: Chassis, including the frame, suspension, chain, etc.
- S: Stands, including the center, stand, and/or kickstand
Step 3 – Get on the Motorcycle
Once you’ve dressed in the right-fit safety gear and finished the motorcycle inspection. You’re good to go now! Let’s start to properly get on your motorcycle:
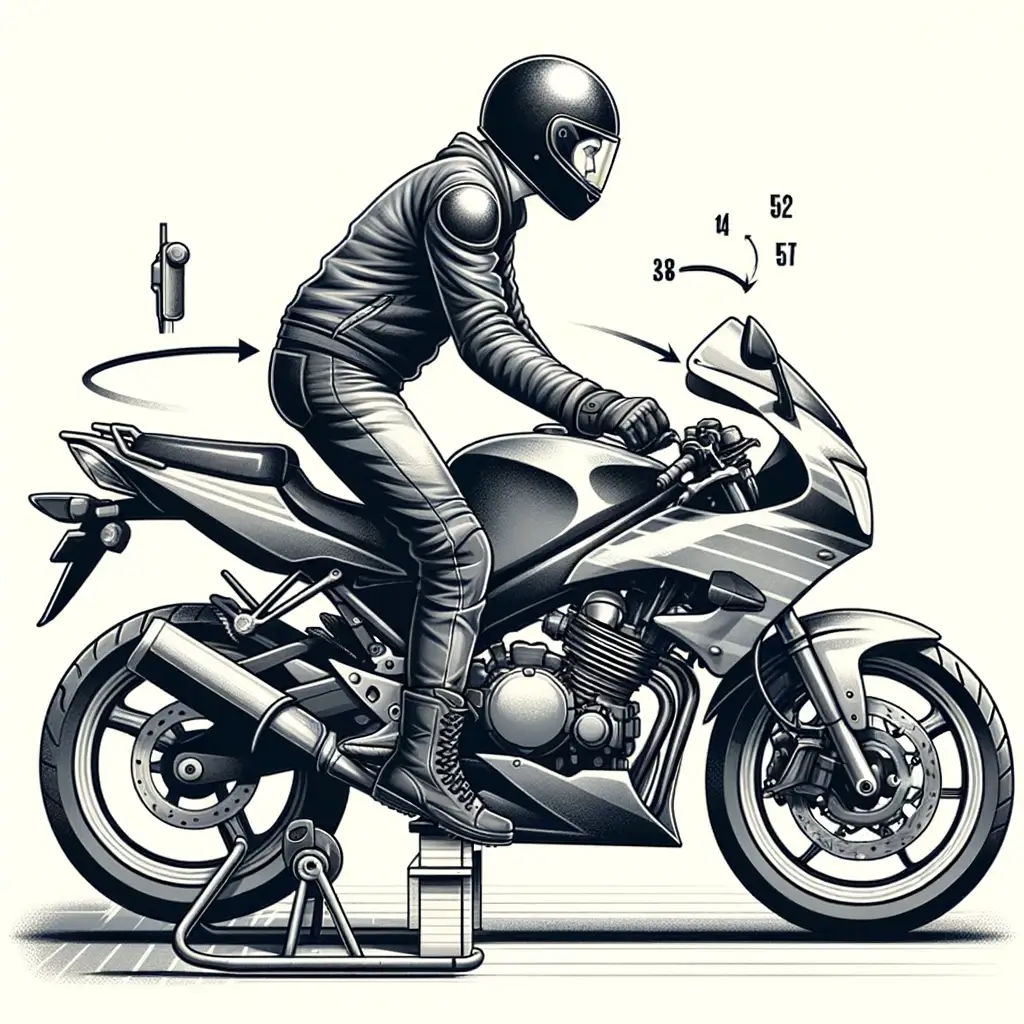
From Left:
- → Stand on the left side of the bike
- → Grab its left handlebar with your left hand
- → Bent your knee
- → Swing your right leg over the seat
To Right:
- → Reach over to grab the right handle with your right hand (pro tip: grab the front brake lever towards you as well to prevent the bike from rolling)
- → Put your feet firmly on the ground
- → Shift your weight onto your right leg
- → Kick the left side kickstand off the ground
Get A Feel On The Bike:
- → Sit down to get a feel for how you fit on it
- → Grip the handlebars, clutch lever, and brake lever (To Make sure you can reach these controls comfortably)
- → Your arms should have a slight bend in the elbow when gripping the handlebars (Switches should be within easy reach of your fingers)
Double Check:
- → Make sure you can easily plant your feet on the ground
- → Get a feel for the weight of the bike underneath you
- → Note: remember to adjust the motorcycle mirrors as you’ll rely on them quite a bit while riding, besides note the footpeg position
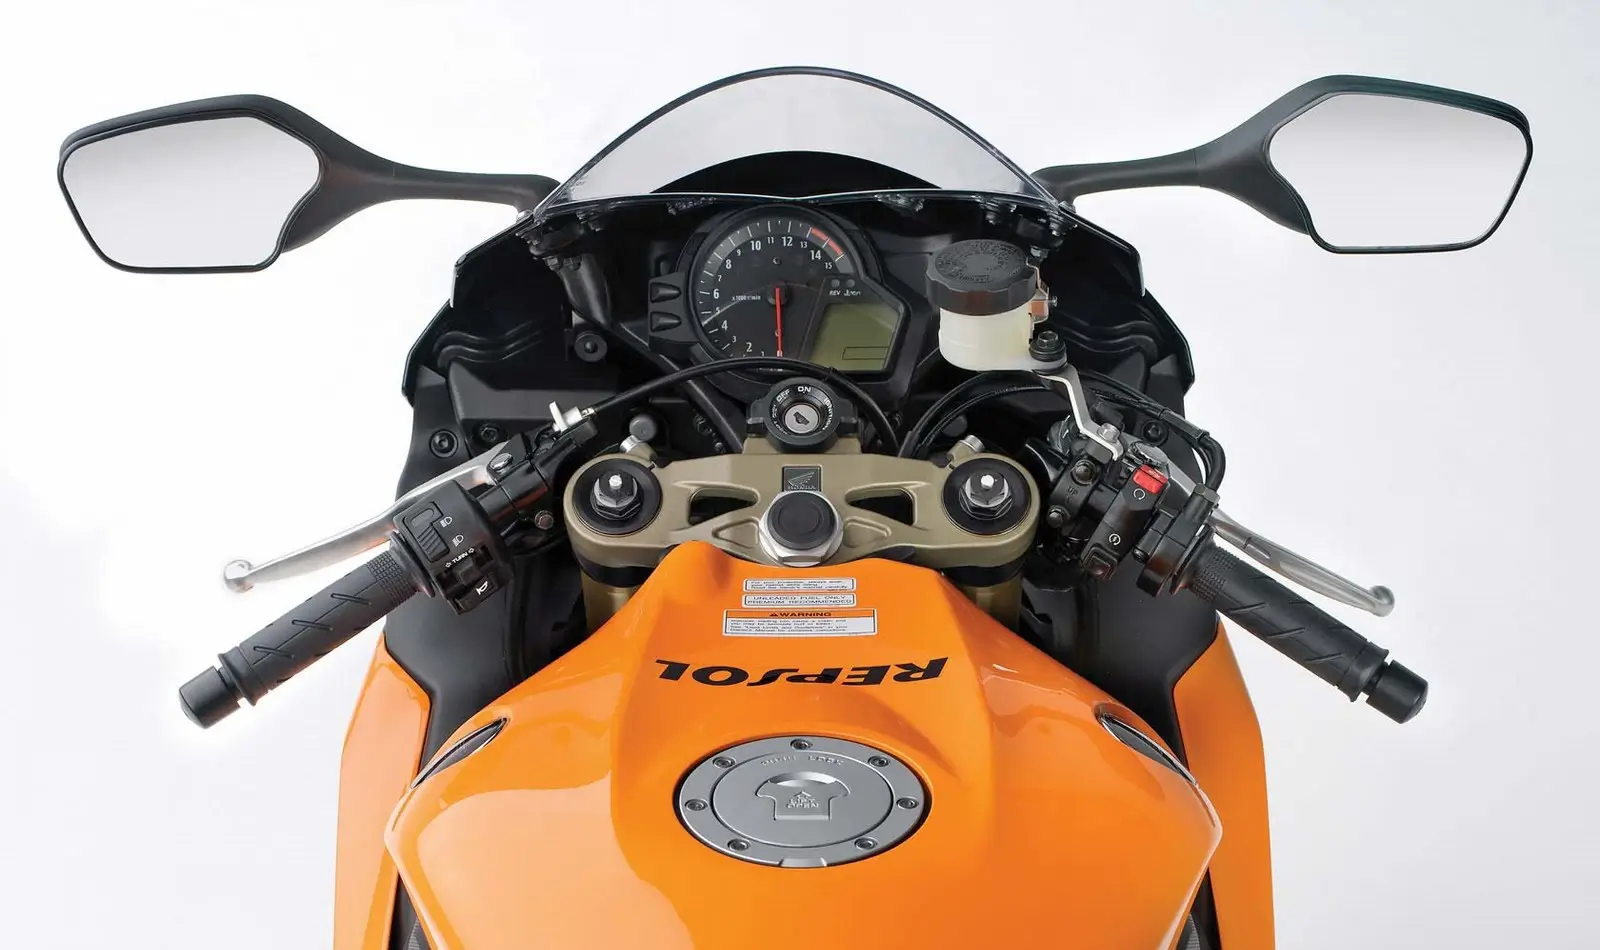
Step 4 – Get Familiar with the Controls
Well done! You’re on the motorcycle now, this is the best way to get to know how a bike operates and go over the functions of the controls.
Don’t be afraid as it’s not starting up yet, nothing will happen to you. Please pay attention to learning the below controls as your safety will rely on them!
Let’s learn from the left to the right side of the motorcycle, we’ve split them into 2 parts.
KEEP IN MIND: As a rule, the left side of your motorcycle controls gears, while the right side controls acceleration and braking.
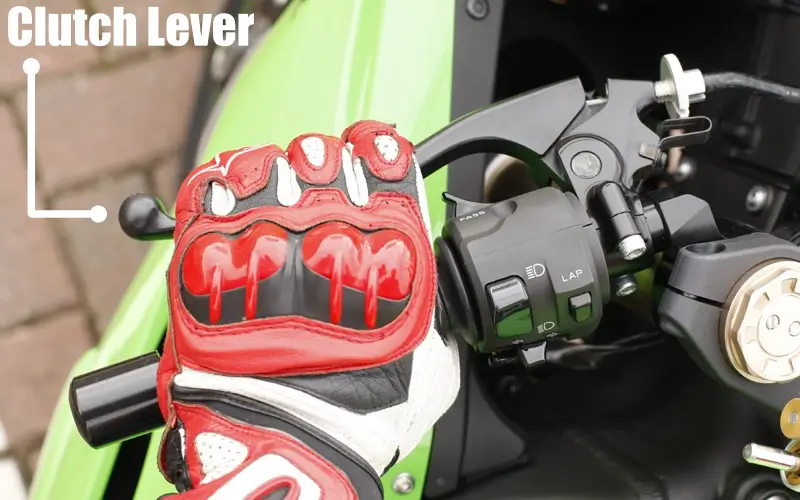
Part 1. Left-hand side – Gearing Up for the Ride
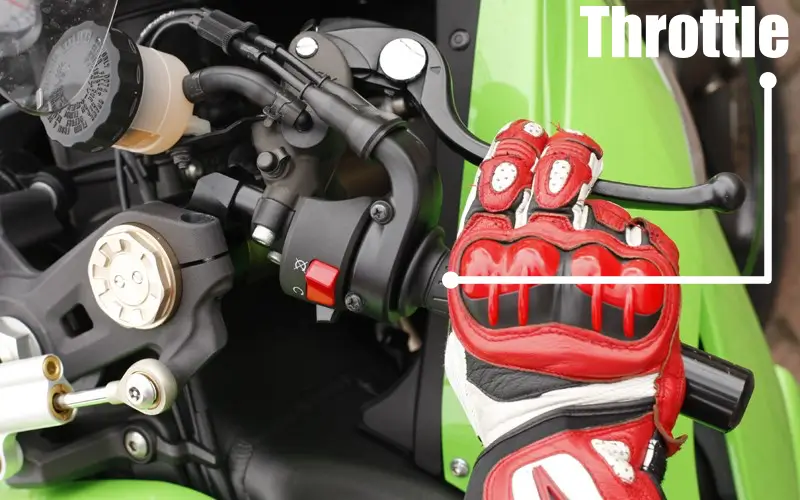
Part 2. Right-hand side – the Motion and Halt
Step 5 – Start to Ride
Congratulations!
It is time for you to start the bike and apply the above theory into practice. Let’s practice one step at a time to build muscle memory to picture them all together.
Please make sure you are now familiar with the motorcycle controls and know how they operate. If not, just go over them again several times, or watch the below video for better understanding.
Part 1. Starting the Motorcycle
Follow the below steps to start your motorcycle:
1. Make sure the motorcycle kickstand is in the UP status. Most modern motorcycles automatically shut off if it is still down when you put the bike into gear.
2. Make sure the kill switch is in ON status. As your bike won’t start unless it’s in the “On” position, if it’s in off status, simply flip it down now.
3. Turn the key to the “Ignition” position, which is typical of the ON position toward the right. You should see the dash lights up now.
4. Look for the green “N” lights up in the dash to set the bike in neutral. By doing so, the easiest way to do this is to use the left hand to pull the clutch lever, use the left foot downshift to 1st gear then shift slightly up. Repeat this process several times until you figure it out.
5. Press the “Start” button with your right thumb. Press the starter button for a few seconds, and release it as soon as you hear the engine sound. That means the bike is started now.
6. Warm up your motorcycle for at least 45 seconds. This is to make sure the engine will work properly and provide smooth & consistent power as you begin your ride.
Part 2. Mastering the Clutch
1. Understanding the Clutch
The clutch lever, found on the left side of your handlebar, is your primary tool for controlling the motorcycle’s clutch. When the lever is fully released, the engine’s power is transmitted to the wheels. Pulling the clutch in disconnects the engine from the transmission, allowing the bike to roll without moving forward, regardless of engine speed. This feature is essential for smooth starts and stops, and as a safety mechanism in case you feel overwhelmed or need to halt suddenly.
2. Finding the Friction Zone
Your first step in mastering the clutch is understanding the ‘friction zone’. This is the point where the clutch starts to engage and move the bike forward. To find it, start with the bike in neutral, then shift into first gear. Slowly release the clutch lever until you feel the bike begin to move. This is the friction zone. Practice moving in and out of this zone without stalling the bike.
Note: You may stall the bike during this practice and it’s very common as a beginner. No need to panic, just restart the bike and keep practicing.
3. Walking the Bike
At low speeds, steering a motorcycle is straightforward: turn the handlebars in the direction you want to go. This direct steering is what you’ll use for now.
Now use only the clutch to walk the bike forward. This practice is to help you get familiar with the clutch operation. While “power walking” the bike, you should pay attention to keeping the bike steady with your feet.
OK, let’s do it now:
- First, pull the clutch lever in.
- Then, use the left foot to shift down to the first gear.
- Next, slowly release the clutch lever.
- Keep the clutch still in position when the bike starts to pull itself forward.
- Well done you’re walking the motorcycle now!
Repeat this until you can keep the bike upright when you pull your feet off the ground. You want to get a good sense of balance on your bike.
4. Using the Throttle
As you become comfortable with the friction zone, you’ll start integrating the throttle. The key is to balance the release of the clutch with a gentle application of throttle. This coordination is critical for smooth acceleration.
Now use both the clutch & throttle to drive. In the practice of step 3, while you’re releasing the clutch, the bike could be stalling. This time, you could twist the throttle slightly to prevent it.
Now your bike should start moving smoothly then you can release the clutch completely and twist slightly again the throttle to keep going.
Once the bike exceeds the walking speed, you should put your feet on the footpegs. At the same time keep still roll on the throttle and try straight-line riding.
Step 6 – Stop the Motorcycle
While you’re moving faster and the end of the road is coming, it’s time to stop the bike especially if you haven’t practiced turning the motorcycle yet.
Follow the below steps to stop your motorcycle:
- First, slow down the bike by rolling off the throttle.
- Then, pull the clutch lever to disengage the engine, and keep hold of it.
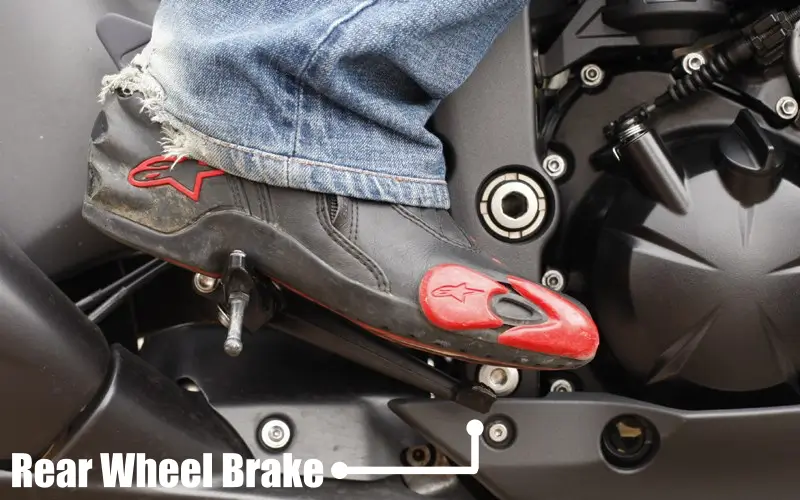
- Next, press gradually the rear brake lever and squeeze the front brake lever simultaneously.
- Your bike should almost stop now, use your left foot to touch the ground first in case you still need to use the rear brake if needed. When you are stopped, put your right foot on the ground.
- Take a break now if needed.
That’s it, now you’re able to not only ride on the bike but also stop it whenever you like.
Step 7 – Practice Steering the Motorcycle
As we’ve mentioned above, you won’t be able to ride in a straight line, you’ll need to know how to steer your motorcycle. Turning is easier to do than to describe, just trust your instincts when you’re on a bike.
It’s much like a bicycle turning, to complete your turn properly, press the handlebar in the direction you want to go toward the left or right side of the bike, keep your head up and look through the turn.
For example, if you want to turn right:
- Before you start your turn to right, slow down first by releasing the throttle and applying the brakes if needed.
- As you enter your turn, lean slightly to the right while pushing the right handgrip toward you. Don’t apply the brakes during your turn in case of crash…
- Turn your head to look to the end of the turn, keep your eyes on it and your bike will follow your eyes.
- Meanwhile, slowly roll on the throttle as you come out of the turn to keep momentum, add a bit more gas while you lean back up.
- Let the bike right itself, don’t jerk the handlebars.
Step 8 – Practice Shifting the Motorcycle Gears
You’re about to graduate after this section, let’s move on!
During the above practice of riding, steering, and turning the motorcycle, we’re all playing in the first gear of the motorcycle as 1st gear is usually used for starting the bike and slow-speed maneuvering.
At the time you twist the throttle for faster speed, I bet you must have heard the loud noise coming from the engine and feel it start revving at higher rpms. It typically means that you need to upshift gears now for high speed purpose.
It will take some practice to be able to feel and hear when it’s time to shift. Let’s practice unshifting gears now, make sure you’re able to start riding in a straight line:
- First, roll off the throttle.
- Then, pull the clutch lever in.
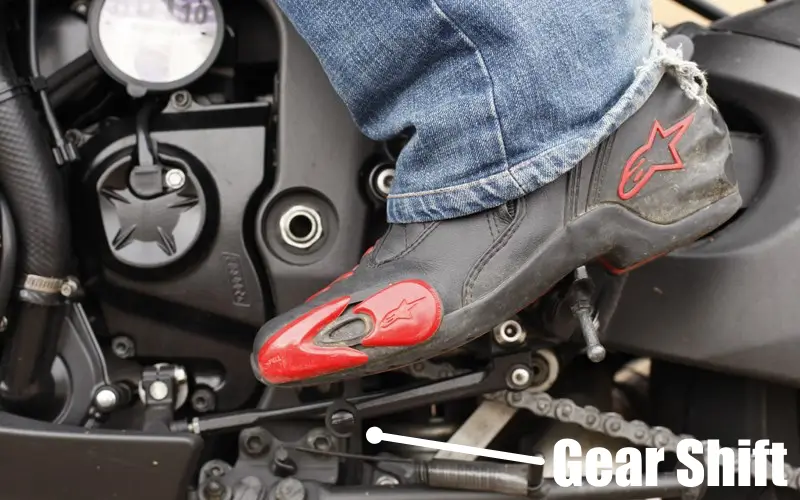
- Next, use your left foot to firmly press the shifter lever up. You should feel that the gear is clicked in.
- Now slowly release the clutch and roll on the throttle simultaneously to finish the upshift.
- Repeat this process to shift through higher gears.
To downshift, the steps are similar:
- Release the throttle
- Squeezing the brake lever slightly.
- Pull your clutch in.
- Press down on your shifter.
- Let out your clutch.
After you get a feeling of shifting, you can simply decide when to shift by yourselves but do not downshift to first gear unless you’re coming to a complete stop.
Meanwhile, try to get a feel for the “friction zone”. The friction zone is the area of resistance created as the clutch becomes engaged. This area allows for the transfer of power from the engine to the rear wheel.
Conclusion
Eventually, now that you’ve practiced starting, stopping, turning and shifting your bike. It is going to be one of your most incredible experiences, isn’t it?
Although the first few days of learning to ride a motorcycle could possibly be the most dangerous time in your life.
- Remember to start slowly as learning how to ride a motorcycle with skill takes time and practice.
- Remember to follow the proper steps as it’ll make your riding more graceful and effortless.
Keep practicing and enjoy this learning process, it’s amazing and you’re good to get your motorcycle license pretty soon.
See you on the road!
